Printer selection
There are different options for assigning printers.
- Default printer - set on dashboard
- Template defined printer - Date Entry Templates
- Template defined printer - File Drop Automation
- Print to Images
- Print to File
Default Printer
Set your default printer on the dashboard below the banner. This will be the printer use for any template that does not have another printer selected at the template level (described below). Templates assigned at the template level will override the default printer.
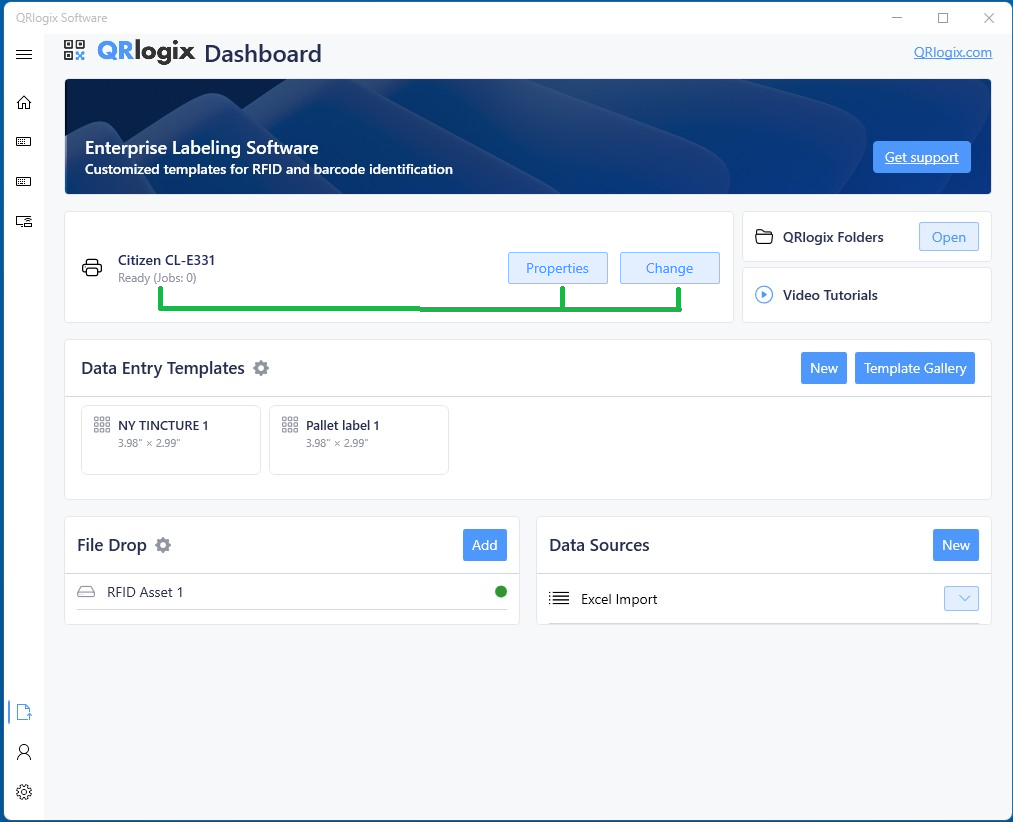
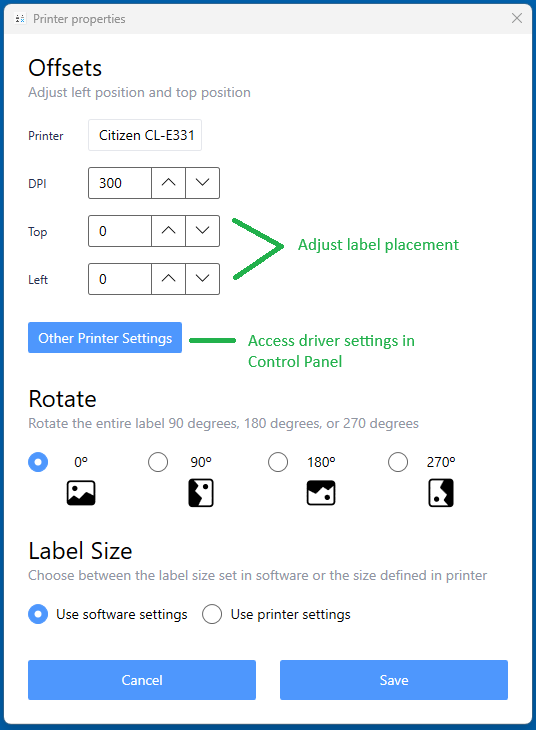
Printer Properties allows user to adjust label positioning, rate the label, and use printer settings or software settings.
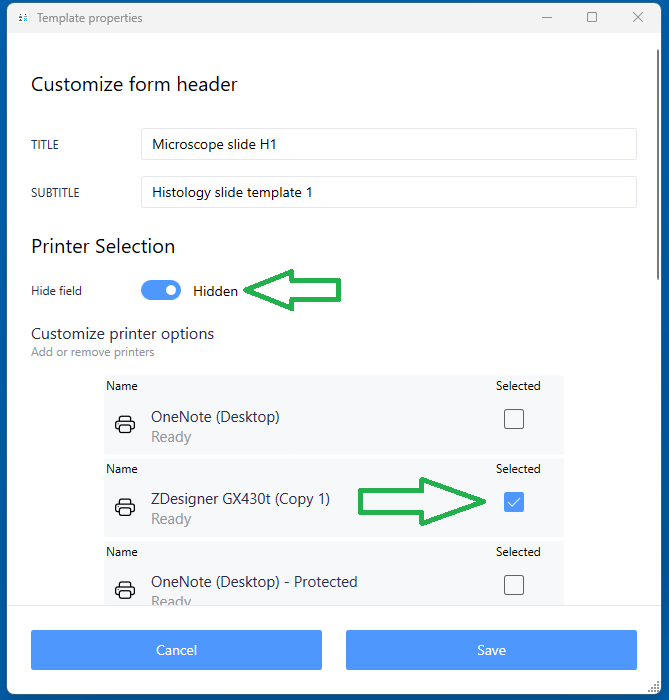
Template Defined Printer - Data Entry Templates
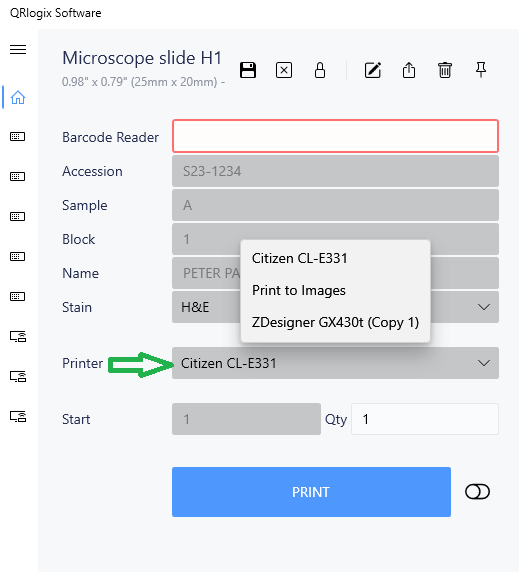
From Form Builder, click on Properties
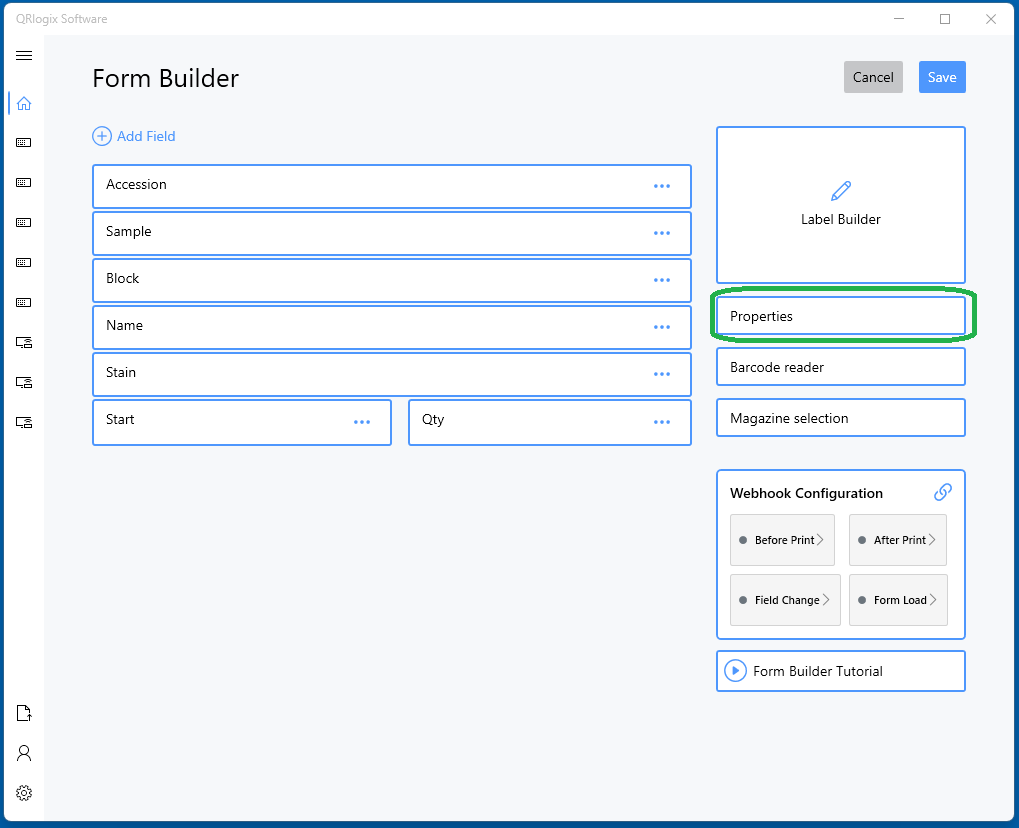
Then, unhide Printer Selection and select the printers you would like to appear in a dropdown list on the print form. You must select 1 or more printers.
The printer dropdown will then be accessible from the print form:
Template defined printer - File Drop Automation
In File Drop Automation, a printer can be assigned through the data string that is sent.
To configure, click the Settings dropdown from the File Drop template page, then select Printer Settings. The printer order can be reconfigured as needed. We suggest moving the printers you'll print to, to the top of the list - #1, #2, #3, and so on.
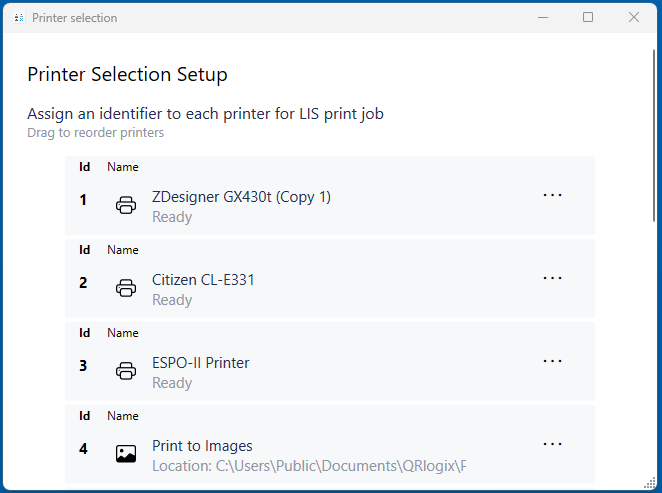
Note the printer ID numbers that you want to print to.
In Data Settings, add the printer to field order where it will be in the data file.
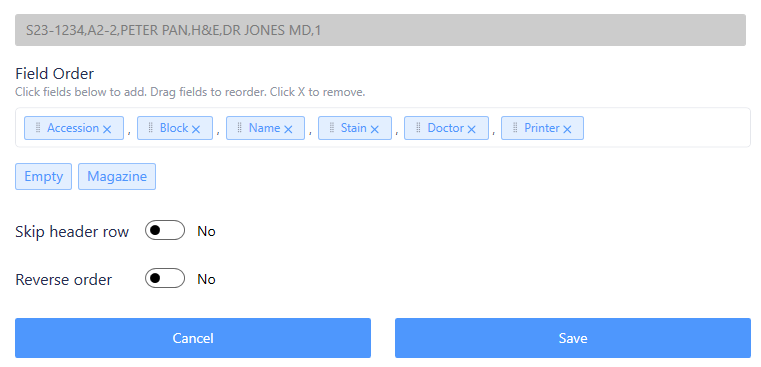
In the above scenario, if the data file contains 1, then the print job will be routed to printer 1. If the data file contains 2, the print job will route to printer 3 from the list of printers.
Click below to learn about Print to Images

Click below to learn about Print to File
