Lock/Unlock Form Fields

Locking form fields is a powerful workflow optimization feature that retains data between print jobs and allows the cursor to skip locked fields during data entry. This significantly speeds up repetitive labeling tasks.

What is Field Locking?

When a field is locked:

  • The data in that field is retained after printing
  • The cursor automatically skips the field during data entry (Tab key)
  • The field can still be manually clicked and edited
  • A lock icon appears next to the field

When unlocked:

  • The field clears after printing (or follows Repeat Last Data setting)
  • The cursor stops at the field during data entry
  • Normal behavior resumes

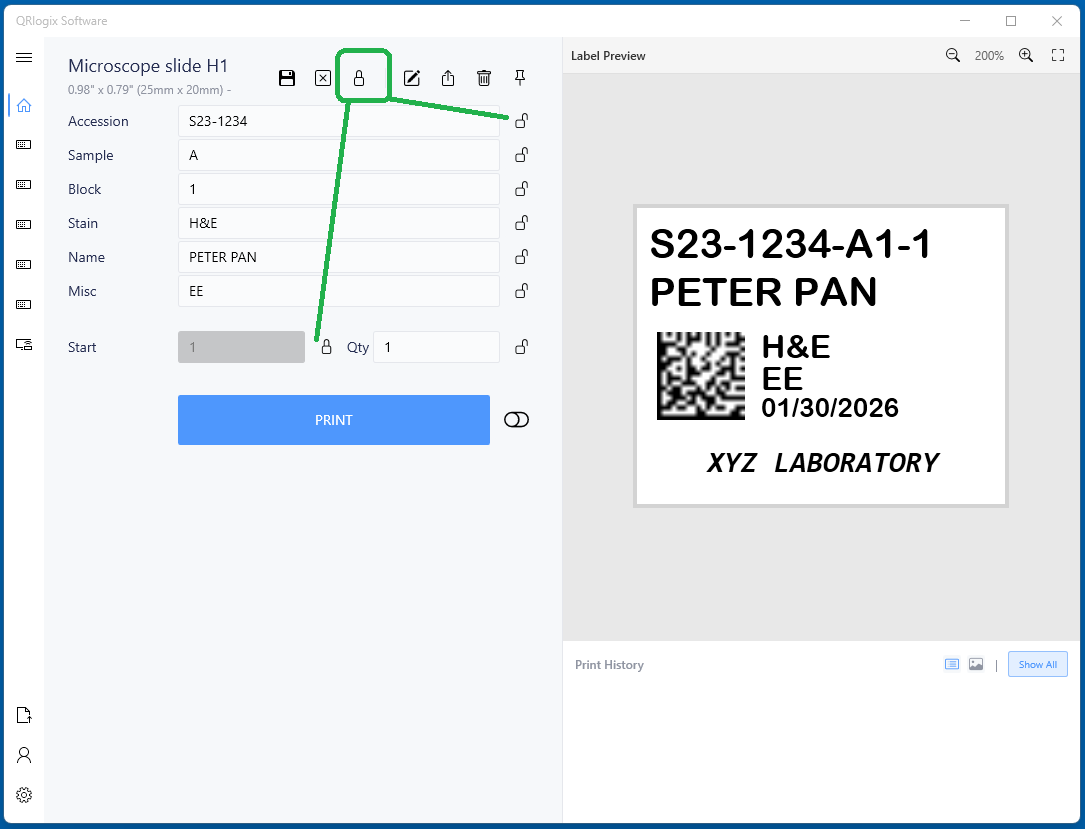
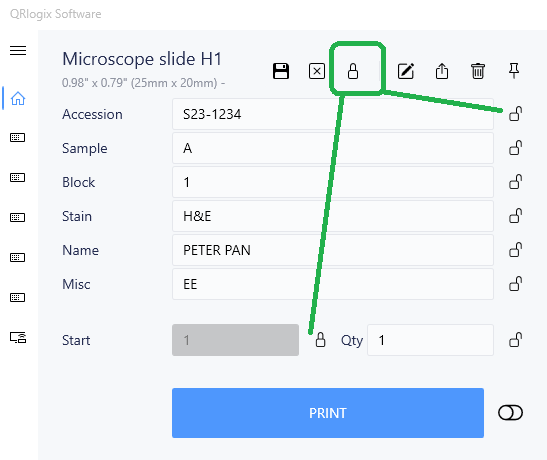
Accessing Lock/Unlock

Option 1: From the Template Form

Lock Icon on Form
  1. Open your template
  2. Locate the lock icon next to form fields
  3. Click to lock/unlock individual fields

Option 2: From Options Menu

Options Dropdown
  1. Click Options dropdown
  2. Select lock/unlock options
  3. Configure multiple fields at once

How Locking Improves Workflow

Before Locking (Slower Workflow)

Printing 20 slides with same date, stain, and technician:

Print 1: Enter case, date, stain, tech → Print
Print 2: Enter case, date, stain, tech → Print
Print 3: Enter case, date, stain, tech → Print
...

Result: Entering the same date, stain, and tech 20 times

After Locking (Faster Workflow)

Lock the date, stain, and technician fields:

Setup: Enter date, stain, tech once → Lock fields
Print 1: Enter case only → Print
Print 2: Enter case only → Print
Print 3: Enter case only → Print
...

Result: Only enter changing data (case number). Date, stain, tech remain locked.

When to Lock Fields

Fields Perfect for Locking

High-frequency, low-change data:

  • Current date (for today's slides)
  • Technician name (for current user)
  • Department (rarely changes)
  • Standard stain (H&E for routine work)
  • Protocol name (for batch processing)

Fields to Keep Unlocked

Variable data that changes frequently:

  • Case numbers (unique each time)
  • Patient names (different per case)
  • Specimen letters (varies)
  • Slide numbers (sequential or changing)

Using Locked Fields

Typical Workflow

Morning Setup:

  1. Open template
  2. Enter today's date
  3. Enter your technician initials
  4. Select standard stain (e.g., H&E)
  5. Lock these three fields
  6. Begin processing cases

During the Day:

  • Only enter case-specific data (case number, specimen ID)
  • Locked fields remain constant
  • Tab key automatically skips locked fields

When Finished:

  • Unlock fields for next day
  • Or leave locked if same person/stain tomorrow

Example: Routine H&E Processing

Locked Fields:

  • Date: "01/25/2026"
  • Stain: "H&E"
  • Technician: "JD"
  • Department: "Histology"

Unlocked Fields (enter each time):

  • Case Number: Changes per specimen
  • Specimen Letter: A, B, C, etc.
  • Slide Number: 1, 2, 3, etc.

Result: 3 seconds per label instead of 15 seconds

Advanced Locking Strategies

Scenario-Based Locking

Morning Routine Cases:

  • Lock: Date, H&E, Technician
  • Unlock: All case-specific fields

Afternoon Special Stains:

  • Unlock H&E
  • Lock: Date, Technician
  • Change stain for each batch
  • Lock new stain for batch duration

IHC Processing:

  • Lock: Date, Protocol name, Technician
  • Unlock: Case, Marker (from panel)

Batch Processing

When processing a batch of similar specimens:

Setup the batch:

  • Enter common data (date, stain, tech, project)
  • Lock common fields

Process specimens:

  • Enter only unique data per specimen
  • Print rapidly through batch

Complete the batch:

  • Unlock fields when done
  • Ready for next batch

Locking with Other Features

Combined with Repeat Last Data

  • Locked: Field stays unchanged, cursor skips
  • Repeat Last Data (unlocked): Field auto-fills, cursor stops, can change

Best practice: Use Locked for truly constant data, Repeat Last Data for frequently repeated but occasionally different data.

Combined with Auto-Increment

Numeric fields with auto-increment can be locked:

  • Number increments automatically
  • Field remains locked
  • Cursor skips, but number increases

Perfect for: Daily accession counters

Combined with Barcode Scanning

Lock fields that come from barcode scanning:

  • Scan populates locked fields
  • Data retained between scans
  • Cursor skips to next unlocked field

Visual Indicators

Locked fields show:

  • Lock icon next to the field name
  • Usually grayed out or different background color
  • Cursor skips during Tab navigation

To edit a locked field:

  • Click directly on the field (cursor appears)
  • Or unlock the field first

Common Workflows

Single Technician Station

Best Setup:

  • Lock technician name permanently
  • Lock date each morning
  • Lock current stain for each batch
  • Leave case data unlocked

Multi-User Workstation

Best Setup:

  • Don't lock technician (changes per user)
  • Lock date each morning
  • Lock department (constant)
  • Leave user-specific fields unlocked

Research Study

Best Setup:

  • Lock study ID (constant)
  • Lock protocol version (rarely changes)
  • Lock date collection date if processing same batch
  • Leave subject-specific data unlocked

Tips for Maximum Efficiency

Tab Order Matters

Locked fields are skipped during Tab navigation:

  1. Order fields logically in Form Builder
  2. Place frequently locked fields at top or bottom
  3. Group unlocked (variable) fields together
  4. Tab through only the fields you need to change

Start-of-Day Routine

Establish a daily startup routine:

  1. Open template
  2. Update date
  3. Confirm technician
  4. Lock date and tech
  5. Begin work

End-of-Day Routine

Clean up for next day:

  1. Unlock all fields (or leave for consistency)
  2. Close template
  3. Next day repeats startup routine

Quick Unlock for Exceptions

When you need to change a locked field:

  • Click directly on the field (temporary edit)
  • Or unlock, change, re-lock

Troubleshooting

Can't Edit a Field

  • Cause: Field is locked
  • Solution: Click directly on field, or unlock it

Cursor Not Skipping Locked Fields

  • Cause: Field may not be properly locked
  • Solution: Check lock icon is visible, re-lock if needed

Locked Data Disappears

  • Cause: Template closed and reopened (locks don't persist between sessions)
  • Solution: Re-enter and re-lock at start of each session

Best Practices

Lock Strategically

  • Only lock truly repetitive data
  • Over-locking makes corrections harder
  • Under-locking wastes time

Visual Check

  • Glance at locked fields before printing
  • Ensure they're still correct (especially date)
  • Quick verify prevents printing errors

Train Your Team

  • Show new users how locking works
  • Establish consistent locking patterns
  • Create workflow documentation

Combine with Templates

  • Create separate templates for different locking scenarios
  • "Routine H&E" template with appropriate locks
  • "Special Stains" template with different locks

Measuring the Impact

Time savings example:

Without locking (10 fields per label):

  • 10 fields × 3 seconds each = 30 seconds per label
  • 100 labels = 50 minutes

With locking (4 fields locked, 6 variable):

  • 6 fields × 3 seconds each = 18 seconds per label
  • 100 labels = 30 minutes
  • Savings: 20 minutes (40% faster)

Next Steps

Need Help?

Questions about field locking?


Related Articles: