Label Builder
Label Builder is QRlogix Software's powerful visual label design tool that allows you to create professional labels with text, barcodes, RFID, images, and more. This comprehensive overview covers everything you need to know to design effective labels.
Watch the Tutorial
Label Builder Overview?
Label Builder allows you to:
- Design label layouts - drag-and-drop functionality
- Add form field data - to labels
- Insert barcodes - for tracking
- Encode RFID tags into labels - for tracking
- Concatenate data - connect different data with clean formatting
- Add static text
- Add images
- Control positioning and formatting
- Preview labels with sample data in real-time

Accessing Label Builder
For New Templates
- First: Setup label size and complete Form Builder setup first
- Next: Click Label Builder button to proceed
For Existing Templates
- Open template
- Click Options → Customize Template
- Click Label Builder (or Label Settings for File Drop)
Label Builder Interface
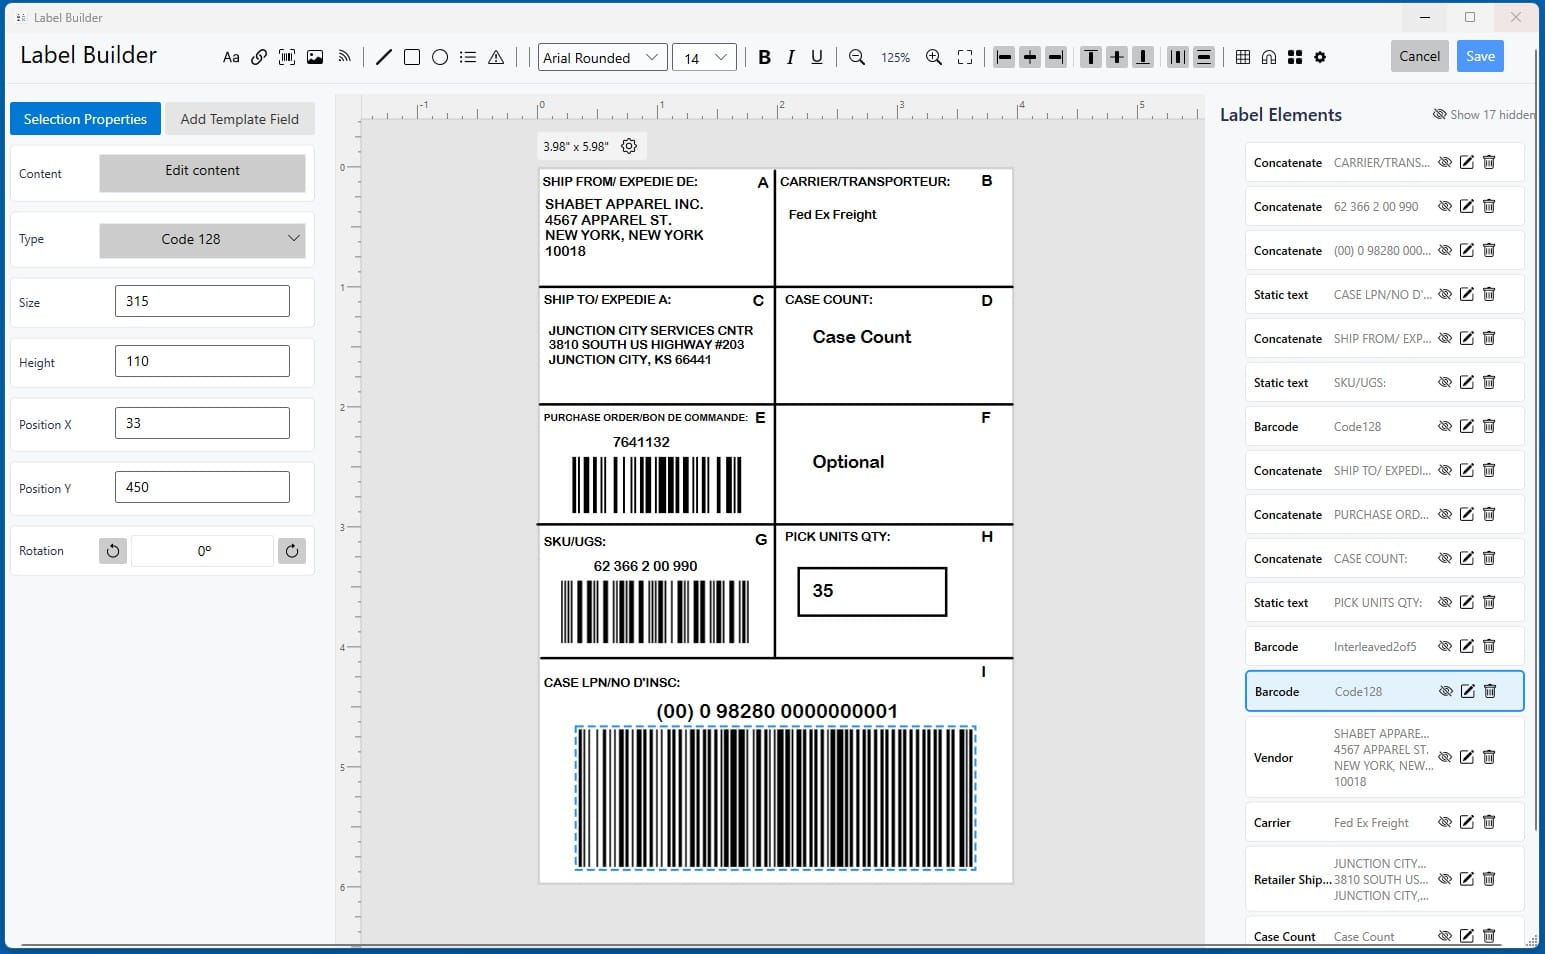
Key Components
Functions (Icons at top - listed from left to right)
- Static Text: Add static text - prints on every label
- Concatenate: Connect form fields and static text in clean strings
- Barcode: Add a barcode to the label
- Image: Add an image to the label
- RFID: Encode an RFID tag inside the label
- Line: Add lines to label
- Rectangle - add squares and rectangles
- Circle - Add ellipses to the label
- Nutrition: Add a nutrition panel to the label
- Warnings: Add custom warnings, instructions, etc to a label
- Font: Select the font for the label text elements
- Font size: Select the size of the font elements
- Bold, Italics, Underline
- Zoom in/out
- Reset Zoom
- Element Alignment Tools - Snap to
- Show grid: Adds gridlines to label
Add Template Field
- Adds individual template fields to label
- HINT: Do not use this if you need to connect fields in a string with other data. Instead use the Concatenate feature.
Label Size
- Setting wheel immediately above canvas
- Allows user to change the label size
Selection Properties panel
- Settings for the active (selected) element on the label
- Edit and adjust as needed
Label Defaults (Settings Wheel)
- Grid Size
- Snap Threshold
- Grid color
- Grid opacity
Preview and Testing
Real-Time Preview
The canvas shows your label with sample data as you build it.
What to check:
- All elements visible
- No overlapping
- Proper alignment
- Readable fonts
- Barcode fits and is clear
- Overall appearance professional
Test Print
Before using in production:
- Save your label design
- Return to template form
- Enter realistic test data
- Check label preview (top right of form)
- Test with Print to Images or labels
Saving Your Design
When label design is complete:
- Review all elements one final time
- Check sample data accuracy
- Verify barcode content (if applicable)
- Click Save
Your label design is now applied to the template.
LABEL BUILDER VIDEO
Need Help?
Questions about Label Builder?
- Phone Support: 800-650-0632
- Email Support: Support@QRlogix.com
- Watch Video: Label Builder Tutorial