Data Sources Overview
This section provides an overview of data source connections, and how you can connect your templates to spreadsheets, CSV files, databases, API's, and other platforms such as Inventory Management Systems, EMR/LIS/LIMS systems, and other data management platforms.
VIDEO TUTORIAL - IMPORT FROM EXCEL
OVERVIEW - TUTORIAL
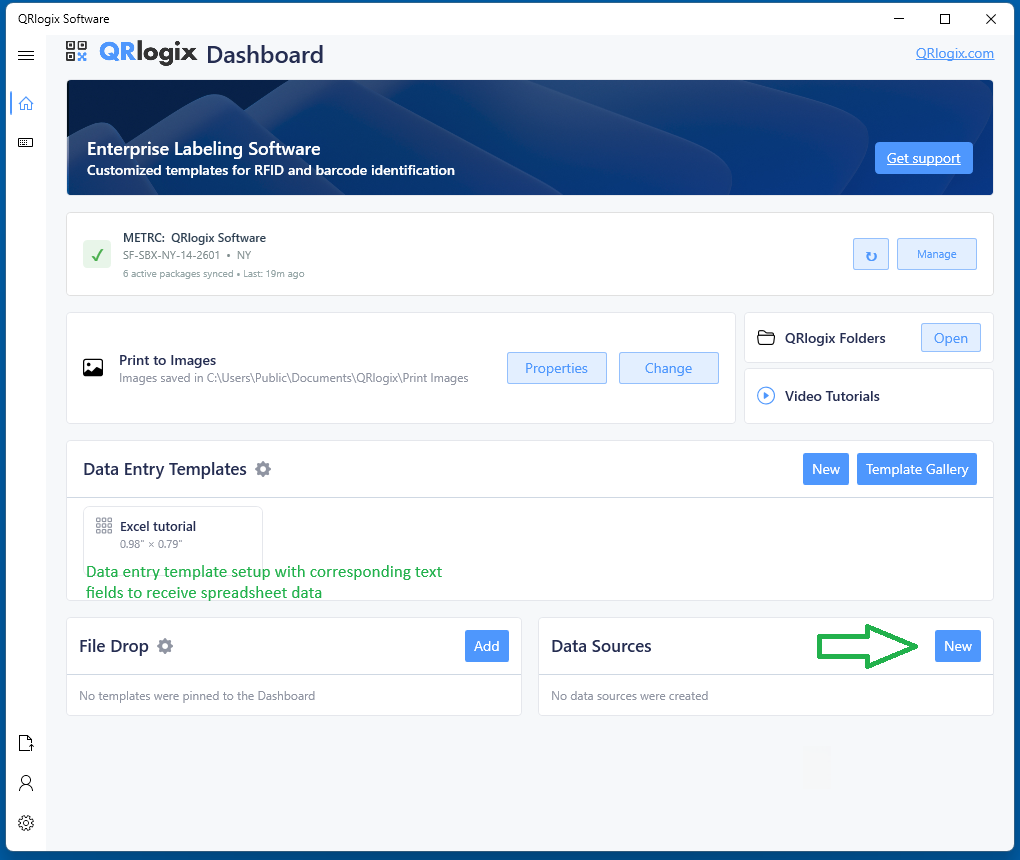
The Data Source feature can be accessed from the lower right corner of the dashboard - shown below.

NOTE: If you would like to follow along with this tutorial, you can find the template and Excel file in the QRlogix -> Misc folder located at the following path: C:\Users\Public\Documents\QRlogix\Misc
CREATE A DATA ENTRY TEMPLATE - MAP TO EXCEL FIELDS
To import from a data source such as Excel, you will first need to create a data entry template. It's a requirement that you create a text field for each column of data you want to import.
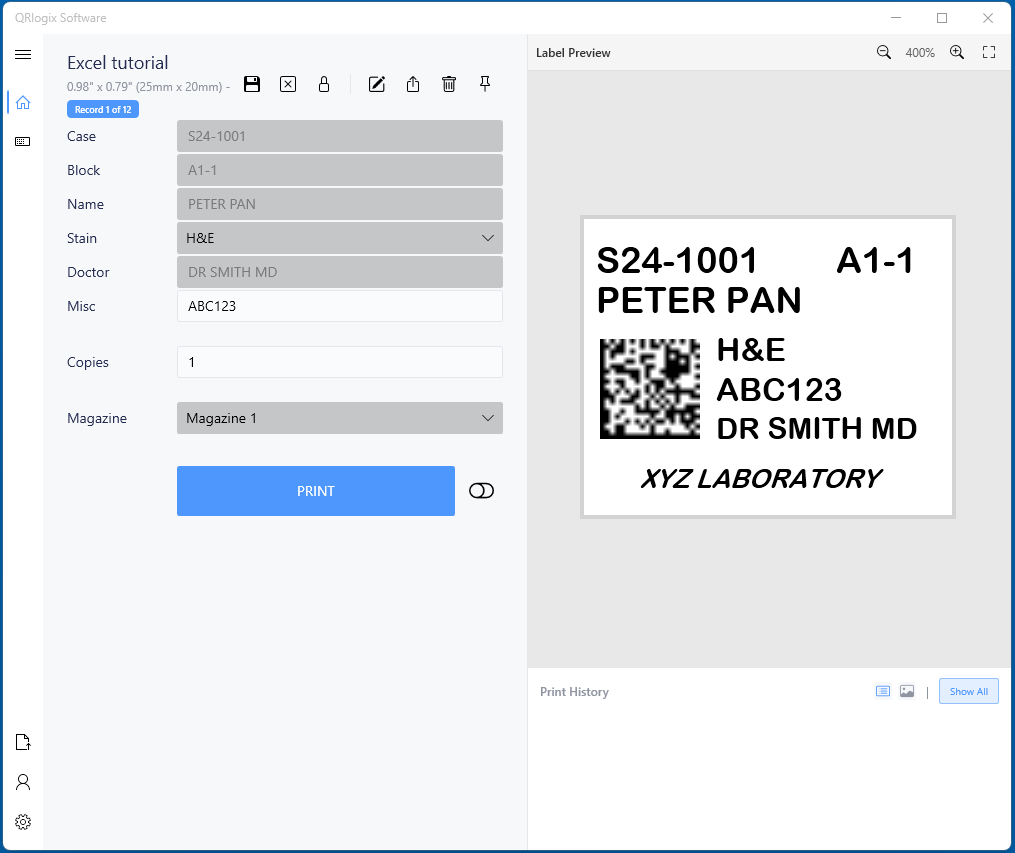
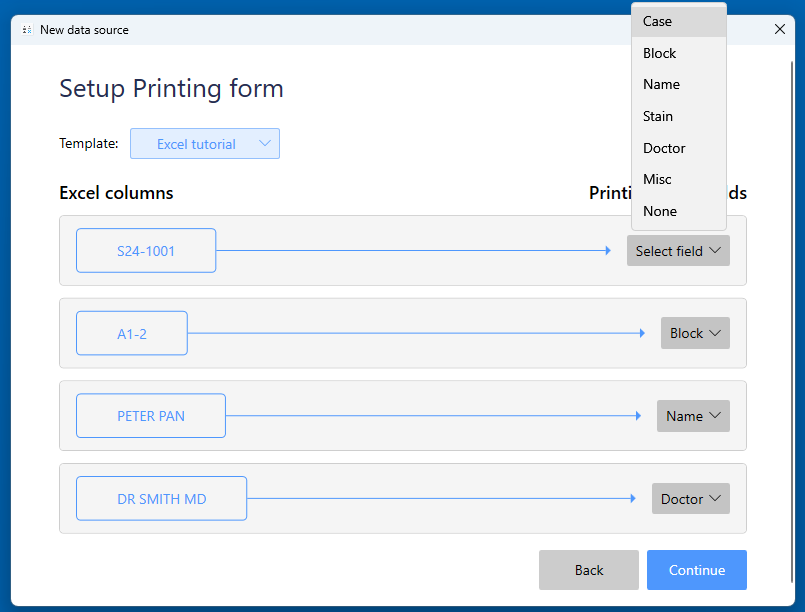
For the example above, the Case, Block, Name and Doctor fields will receive data from the Excel spreadsheet. The data will route from the Excel columns to the corresponding template fields, and then to the label.
HINT: Use the LOCK feature to lock out the fields that will receive data from the spreadsheet.
Once you have the data entry template setup with corresponding fields, you can setup the Data Source connection. To begin, click on the New button on dashboard, to the right of Data Sources.
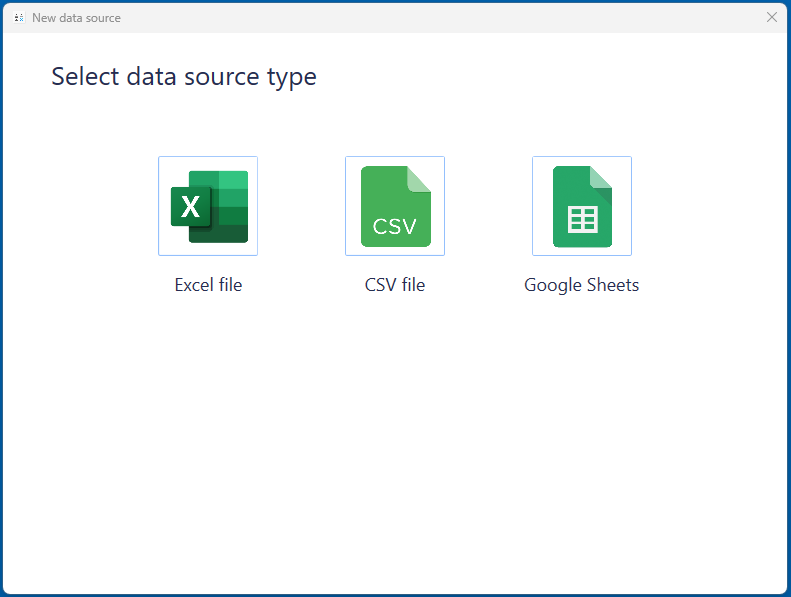
Next, click on the Data source type that you are connecting to.
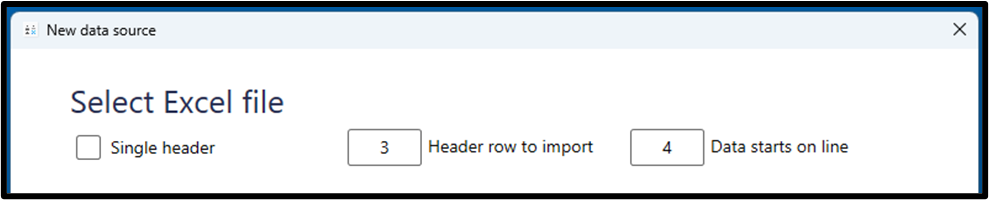
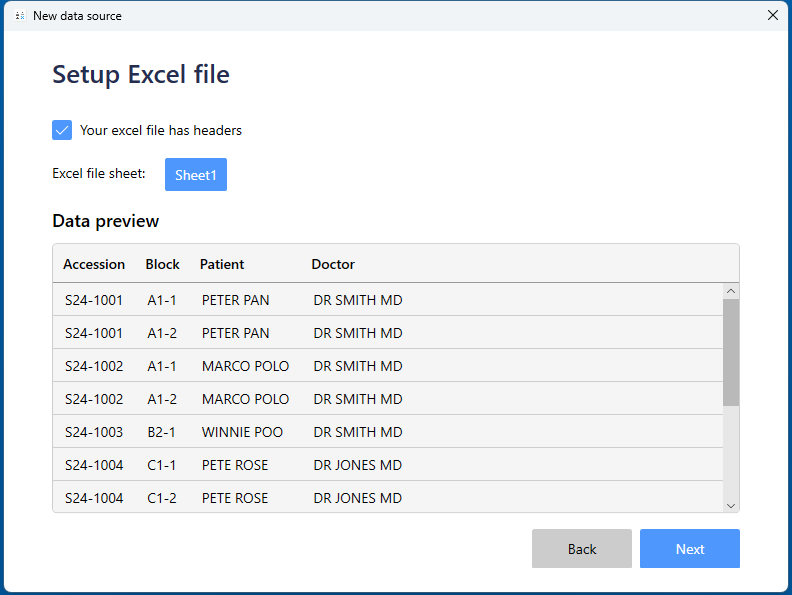
Next, define your header rows to ensure they are skipped over and data from the correct line is imported first.
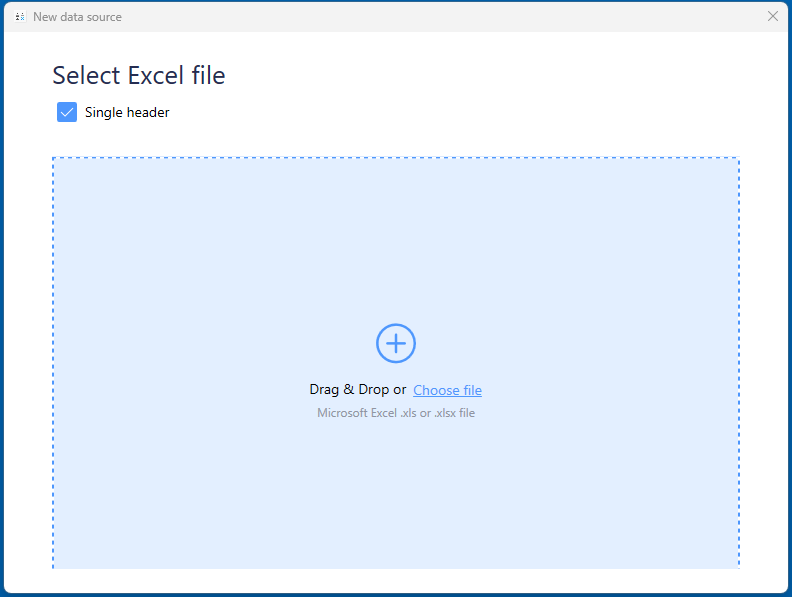
After defining header rows, select the file - drag and drop or navigate to the file and upload it.
The spreadsheet will load into QRlogix Software. If you have multiple sheets, select the sheet you would like to use for this import.
Next, select the template that will map the fields to
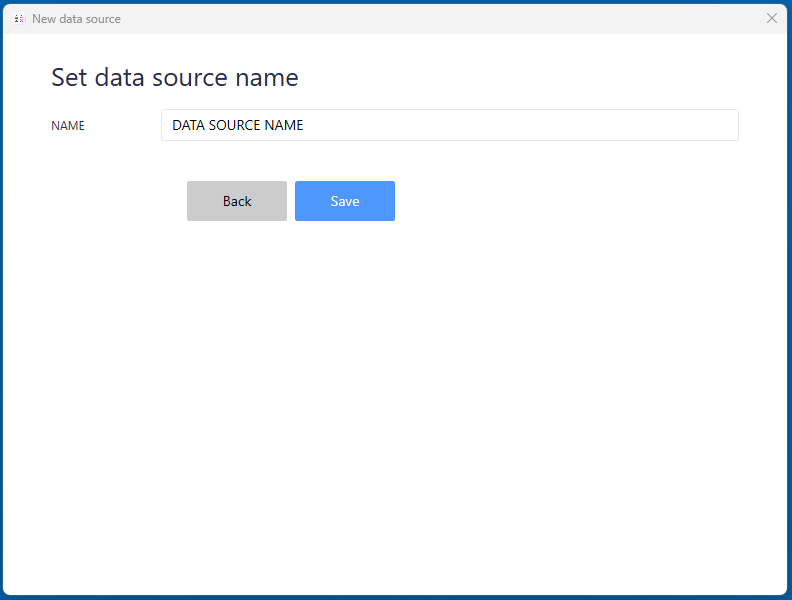
Name the data source.
The data from the spreadsheet will import into a queue for batch printing as shown below. You can Select All Items, or you can select an individual record, a selection of records and print.
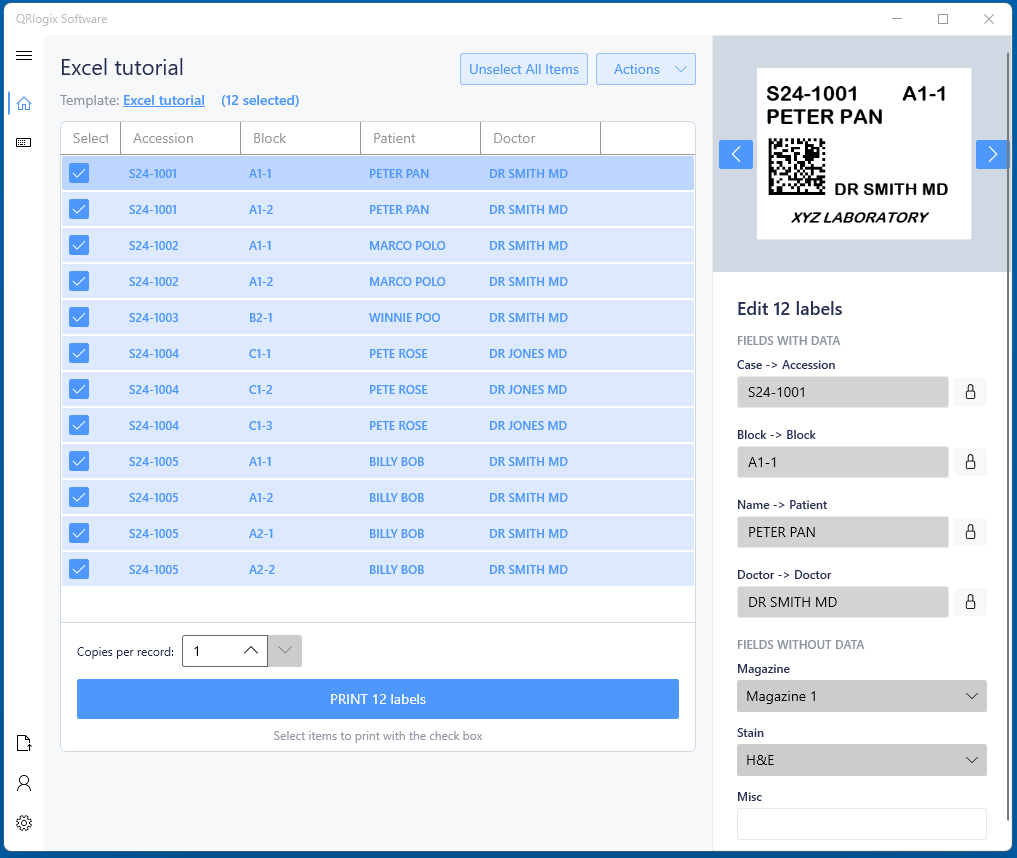
Alternatively, you can print the records from the Template print page by first selecting the records, then clicking Template in the top left corner. You will then be routed to the Form printing page, where you can print the individual records as seen below.

HINT: When printing data source records from the Print form page (above) use the FIELD LOCKS feature to lock the fields that are receiving data from the data source. This will improve efficiency and labeling throughput.
You can now print the records, 1 at a time from the Print form page shown above, or you can batch print them from the Data source queue.
DAILY WORKFLOW
The Action dropdown at the top of the Data Source import page allows you to manage your data source connection.
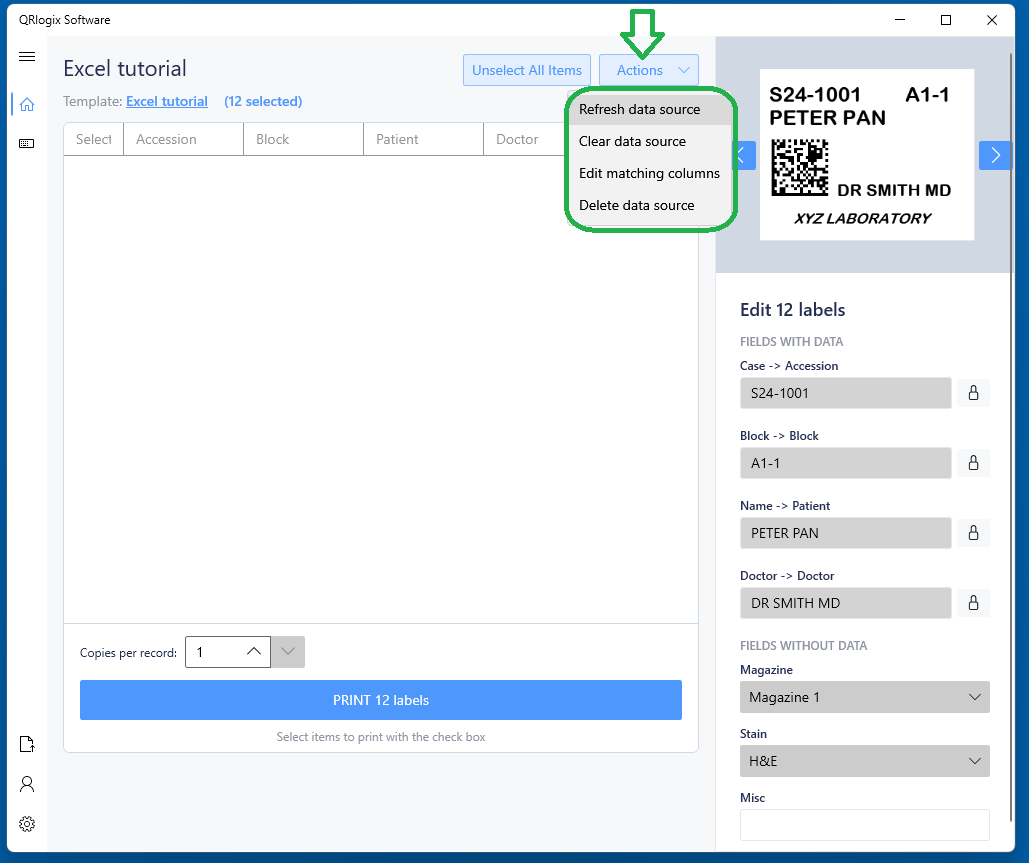
Refresh Data Source - Imports data in from spreadsheet.
Clear Data Source - Deletes any remaining records from the queue so it is clear.
Edit Matching Columns - Remap the spreadsheet columns to the form fields.
Delete Data Source - This deletes the data source so it's no longer available.
VIDEO TUTORIAL - IMPORT FROM EXCEL
