Creating a New Data Entry Template
Data entry templates allow you to print labels with data input from keyboard entry, barcode scanning, or a combination of both. This guide walks you through creating your first template.
Watch the 2-Part Video Tutorial: How to Build a Template
VIDEO 1: Setup and Form Builder
VIDEO 2: Label Builder
Create a template:
- Open QRlogix Software
- On the dashboard, locate the Data Entry Templates section located in the middle of the screen
- Click the New button
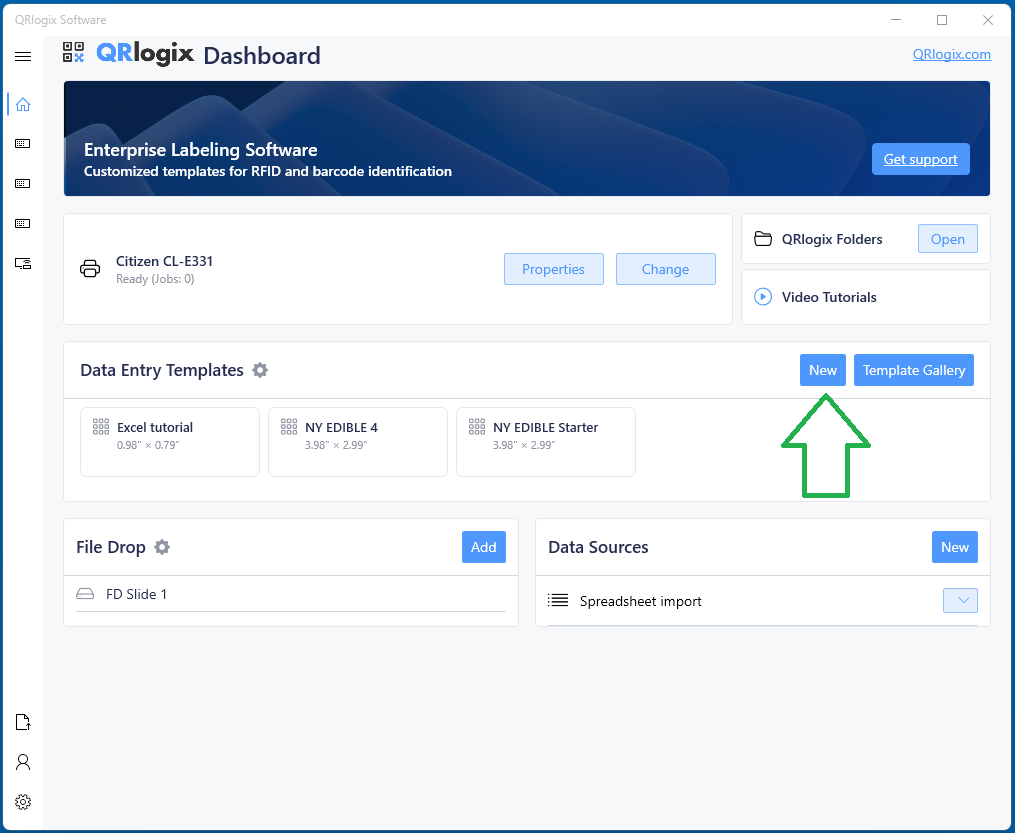
The New Template Wizard will launch to guide you through the setup process.
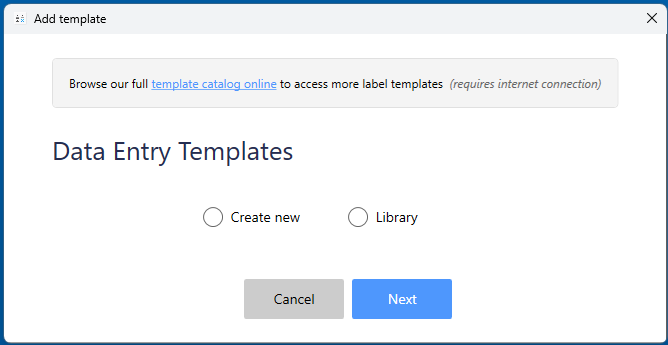
Step 1: Data entry templates
Select Create new, if you want to create a new template from scratch.
You can also access pre-build templates from the Template Gallery, and saved templates from the internal Template Library.
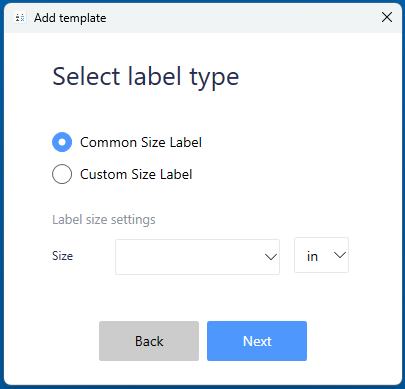
Step 2: Set the label size
Step 3: Select Counter Type
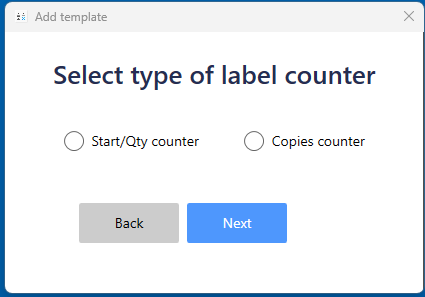
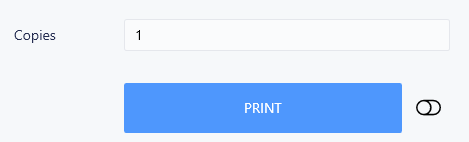
Copies (Duplicates)
- Prints identical labels multiple times
- Same information on each label
- Best for: Duplicate specimens, backup labels
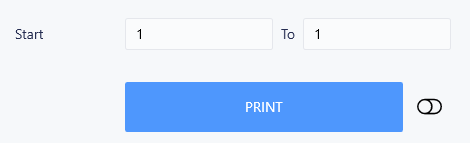
To/From (Sequential)
- Prints sequentially numbered labels
- Each label increments by 1
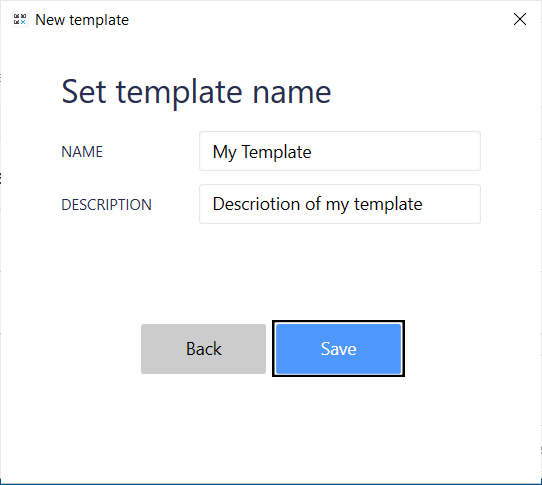
Step 4: Name Your Template
Give your template a descriptive name and description
Step 5: Build Your Form
The Form Builder opens, allowing you to add data entry fields to your template.

Available Form Fields
You can add:
- Text Fields - For alphanumeric data (case numbers, patient names, etc.)
- Numeric Fields - For numbers only (sequential counters, specimen counts)
- Dropdown Boxes - For predefined selections (stains, departments, technicians)
- Panels - For printing multiple labels with different values (IHC panels, stain sets)
- Sequential Letters - For specimen letters (A, B, C, etc.)
- Sequential Numbers - For slide numbers (1, 2, 3, etc.)
- Date Picker - Date selection tool
Adding Fields
- Click Add Field at the top of Form Builder
- Select the field type you want
- Configure the field properties
- Click Save
- Repeat for all needed fields
Important: Add all form fields that will appear on your label. You'll map these to the label design in the next step.
Step 6: Design Your Label
Once form fields are configured, click Label Builder to design the label layout.
For a detailed overview of the label design process, please watch the video on Label Builder:
Step 6: Save and Test
After designing your label:
- Click Save in Label Builder
- You'll return to the template form
- Enter sample data
- Check the label preview in the upper right
- Click Print to test
Need Help?
Creating templates is easy, but if you need assistance:
- Phone Support: 800-650-0632
- Email Support: Support@QRlogix.com
- Watch Video Tutorial: New Template Builder