Barcode Reader Setup
QRlogix Software supports barcode scanner integration by automatically populating form fields from scanned data. This eliminates manual typing and reduces the potential for errors.
Please watch the video below for an interactive tutorial showing barcode reader setup:
Before You Begin
What You Need
- Barcode scanner
- Sample barcode to test with
- Understanding of your barcode format and separator characters
How Barcode Integration Works
- User scans a barcode
- Scanner sends data to computer through mouse cursor
- QRlogix Software parses the barcode data using defined separators
- Data automatically populates designated form fields
- Cursor moves to next unlocked field
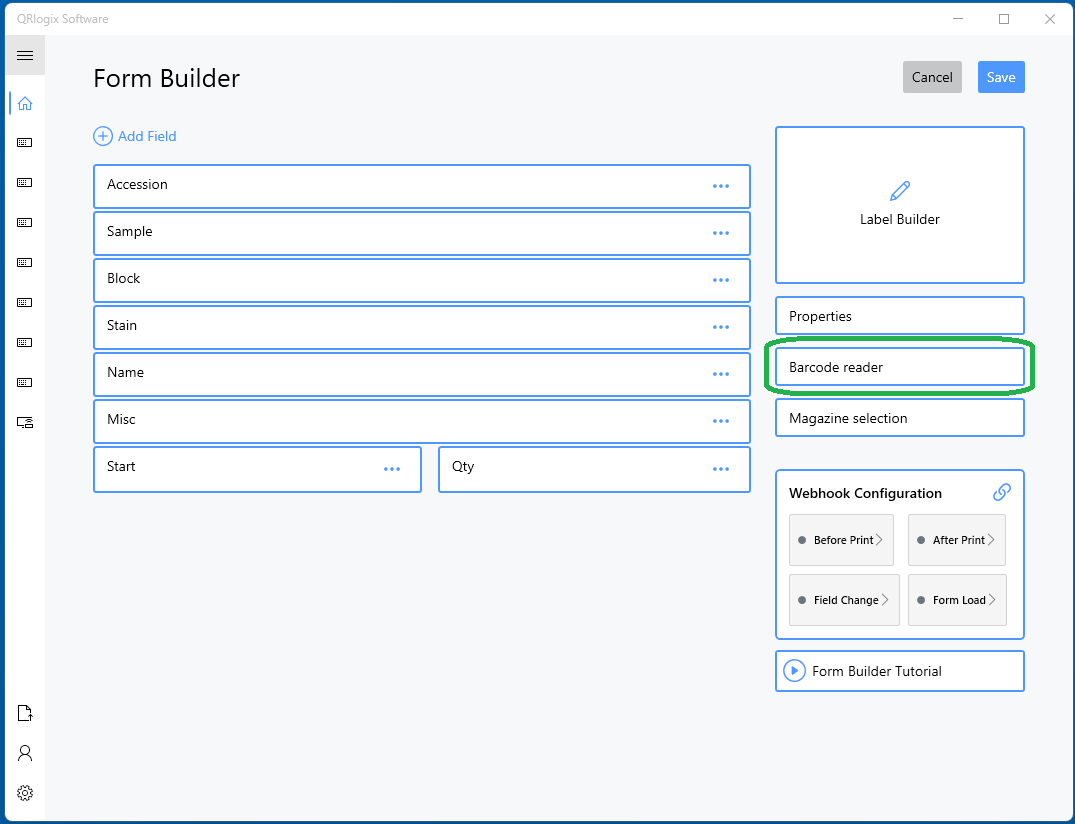
Accessing Barcode Reader Setup
From the Customize Template screen:
- Open your template
- Click Options → Customize Template
- Locate the Barcode Reader field in Form Builder
- Click to configure
Configuration Steps
In Form Builder, click on the Barcode Reader button.
Step 1: Provide Sample Scan
Enter or scan a sample barcode that represents your typical data format.
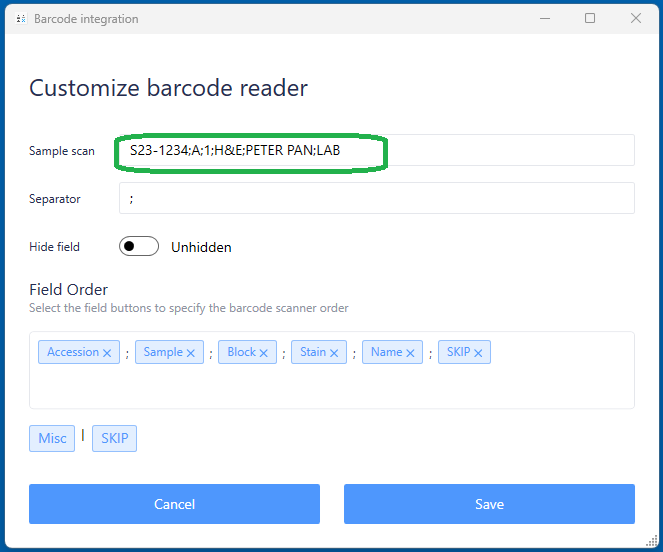
Step 2: Define the Separator
Specify the character(s) that separate data fields in your barcode.
Common separators:
;(semicolon) - Most common,(comma) - CSV style|(pipe) - Database style~(tilde) - Alternative
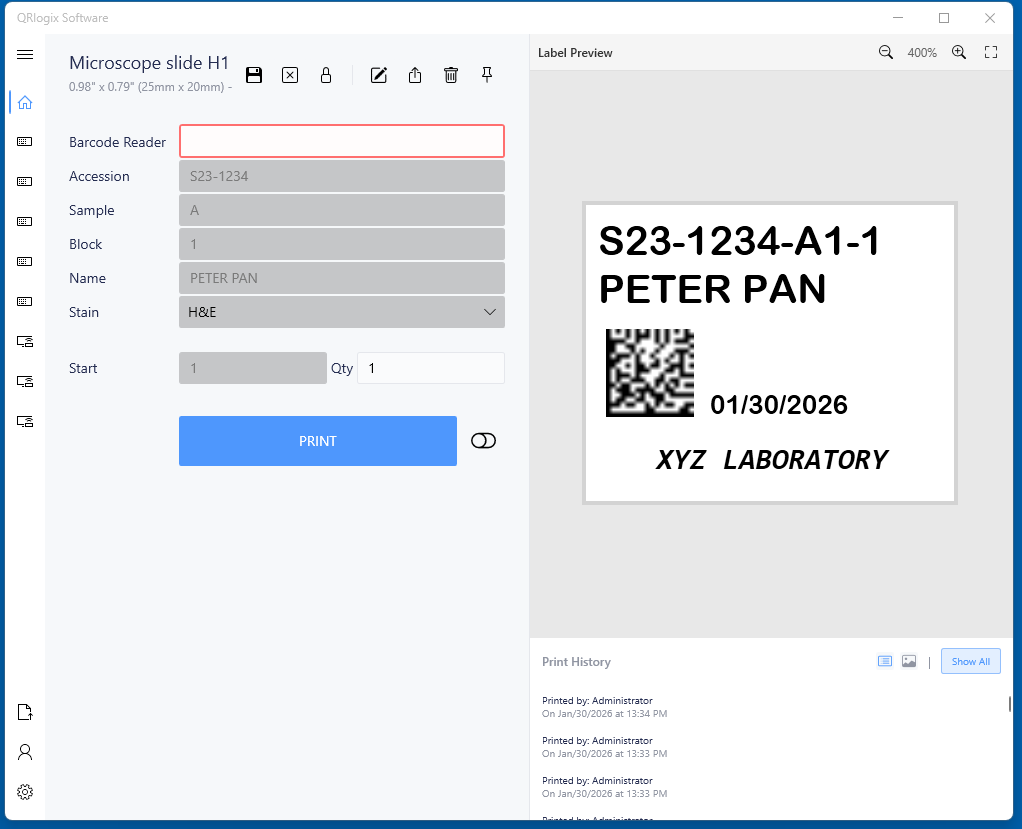
In the example above:
- Barcode:
S23-1234;A;1;H&E;PETER PAN;LAB - Separator:
; - Results in 6 separate fields
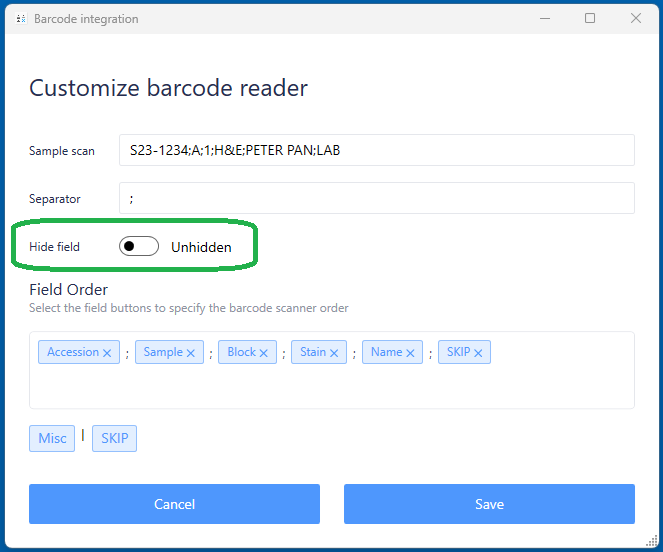
Step 3: Unhide the Barcode Scanner Field
Toggle the "Hide field" option to OFF so the barcode scanner input appears on your template form.
When unhidden, a barcode input field appears at the top of your template form.
Step 4: Map Fields to Data Order
Define which form field receives which piece of scanned data, in order from left to right.
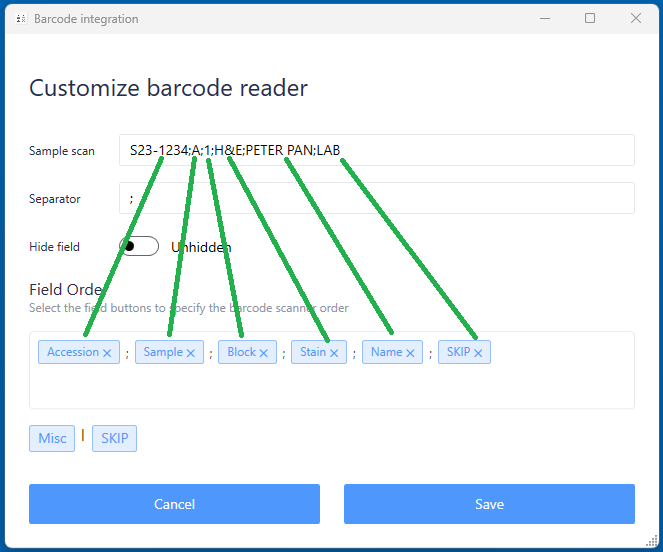
Example Barcode: S23-1234;A;1;H&E;PETER PAN;LAB
Field Mapping:
- Position 1 → Accession
- Position 2 → Sample Letter
- Position 3 → Block number
- Position 4 → Stain
- Position 5 → Name
- Position 6 → SKIP - not needed on label
Using the SKIP Option
If your barcode contains data you don't need, use SKIP for that position.
Step 5: Lock and Edit Fields
After mapping, configure each form field:
- Lock fields that will be populated by the barcode data
- Leave other fields unlocked for manual entry
Why lock barcode-populated fields:
- Prevents accidental manual changes
- Cursor automatically skips locks fields for increased efficiency
Using the Barcode Reader Feature
Once configured, your workflow becomes:
- Scan the barcode
- Fields automatically populate with parsed data
- Locked fields remain populated
- Cursor moves to first unlocked field
- Enter any additional data needed
Testing Your Configuration
Verification Steps
Check sample preview:
- Does it show the data separated correctly?
- Does the data drop into the correct form fields?
Test with real barcode:
- Scan a real barcode
- Verify all fields populate correctly
- Confirm locked fields work as expected
Print test label:
- Verify label shows correct data
- Check formatting and positioning
- Confirm barcode on label scans properly (if using label barcodes)
Need Help?
Questions about barcode scanner setup?
- Phone Support: 800-650-0632
- Email Support: Support@QRlogix.com
- Have your scanner model and sample barcode ready